

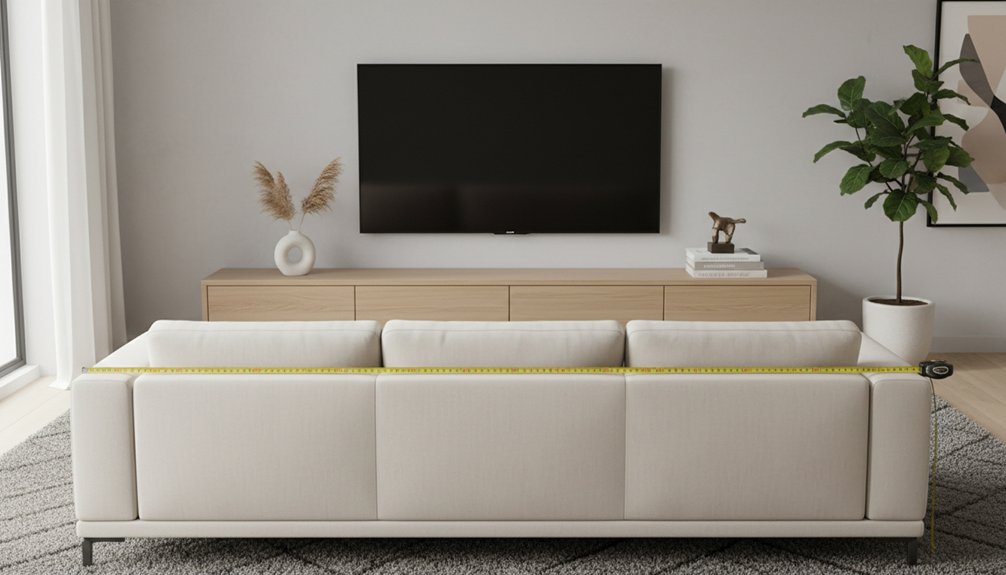
Choose a media unit that measures 6-10 inches wider than your television. This width creates visual balance and provides enough surface space for other items. Set the media unit height between 18-24 inches to ensure your TV screen is positioned at a comfortable eye level, ideally 42-48 inches from the floor. For depth, select a media unit that is 15-20 inches deep, allowing 3-4 extra inches for cable management and component placement.
Measure your wall space accurately. Leave six inches on either side of the media unit to allow for proper ventilation of your electronics. The following sections will explain how to match these dimensions based on your specific TV size and room layout.
When selecting a media unit, consider the size of your TV. For example, if you have a 55-inch TV, a media unit that is 61-65 inches wide will provide the necessary balance. Always maintain the height and depth specifications mentioned earlier to ensure function and comfort in your living space.
Assess your room layout before finalizing your choice. If your room has limited space, you may need to compromise on depth or height. In larger rooms, you can opt for wider media units to fill the space and enhance the overall design.
In summary, prioritize the correct width, height, and depth for your media unit based on your TV size and room dimensions. This approach will ensure that your media unit functions well and complements your living space effectively.
Why Media Unit Size Matters More Than Style
Choosing the right media unit size is crucial for creating a functional and visually appealing living space. An oversized media unit can dominate the room, making it feel cramped. Conversely, a media unit that’s too small can appear out of place and fail to provide sufficient storage for your equipment.
To achieve the right dimensions, measure your space and the equipment you plan to place on the unit. The ideal height for your TV is typically at eye level when seated, which is usually around 42 to 48 inches from the floor to the center of the screen. Additionally, ensure that the width of the media unit corresponds with the size of your TV; for example, if you have a 55-inch TV, aim for a media unit that’s at least 60 inches wide to maintain balance. Creating distinct zones in open layouts can also enhance the overall functionality of your living space.
Proper sizing impacts not only aesthetics but also functionality. A correctly sized media unit allows for smooth movement throughout the room, avoiding awkward gaps and blocked pathways. For instance, ensure there’s at least 24 inches of space between the media unit and any seating to facilitate easy movement.
How to Measure Your Space for Media Unit Planning
To determine if a media unit fits in your living room, measure three key dimensions: wall width, floor-to-ceiling height, and depth from the wall to the nearest piece of furniture or walkway.
Start by measuring the wall width at the location of the media unit. Ensure you leave a minimum of six inches on each side to create visual balance.
Next, measure the height from the floor to the ceiling to confirm the media unit won’t obstruct windows or wall art.
Finally, measure the depth available before reaching your sofa or any high-traffic areas. These measurements are crucial for arranging your living space and ensuring comfortable viewing.
Record all measurements accurately and take them with you when shopping for the media unit. Relying on estimates can lead to costly mistakes and returns, so precise numbers are essential.
Recommended Media Unit Widths for 43″, 55″, 65″, and 75″ TVs
To choose the right media unit width for your TV, start by confirming your available space.
Select a media unit that aligns with your TV size for proper support and visual balance.
For a 43″ TV, opt for a media unit that measures between 50 and 55 inches wide. This width provides solid support and maintains visual proportion in your room.
If you have a 55″ TV, a media unit that’s 60 to 65 inches wide works best. This choice allows extra space for speakers or decorative items.
For a 65″ TV, select a media unit that’s 70 to 75 inches wide.
Lastly, if you own a 75″ TV, you should choose a media unit that’s 80 to 85 inches wide or even larger.
These measurements create an overhang of 6 to 10 inches on each side of your TV, enhancing stability and aesthetic appeal.
Always ensure the media unit can support the weight of your TV for safety and durability.
What’s the Ideal Media Unit Height for Comfortable Viewing?
The optimal media unit height for comfortable viewing is crucial for an enjoyable TV experience. Position your TV screen so that the center aligns with your eye level when seated, which is typically around 42 to 48 inches from the floor for most people. This height ensures that your neck remains in a neutral position during extended viewing sessions.
Consider your seating distance when determining the height as well. For instance, if you sit 8 to 10 feet away from the screen, you can afford to mount the TV slightly higher without compromising comfort. However, if you’re closer—around 6 feet—the screen should be lower to maintain alignment with your eyesight.
Avoid placing the media unit too high or too low, as this can lead to discomfort and strain. For example, a media unit height of over 50 inches might cause viewers to tilt their heads upward, leading to neck strain over time.
Aim for a height that supports a relaxed viewing posture, allowing for an immersive experience without physical discomfort.
Eye Level Viewing Guidelines
To ensure a comfortable viewing experience and avoid neck strain, position your TV screen so its center aligns with your eye level while sitting. For most adults, this optimal height is about 42 inches from the floor to the screen’s midpoint.
To find this height, measure the distance from your couch to where your eyes naturally rest in a seated position.
When setting up larger TV screens, proper alignment is crucial. If the screen is too high or too low, you’ll have to tilt your head frequently, leading to discomfort.
Most media units stand between 18 and 24 inches tall, which works effectively for screens measuring between 50 and 65 inches.
In addition to height, consider viewing distance to prevent eye fatigue. The ideal distance varies based on the screen size, but a general rule is to sit at least 1.5 to 2.5 times the diagonal size of the screen away.
Keeping these ergonomic principles in mind will enhance your movie-watching experience and minimize physical strain.
Standard Height Recommendations
Most media units should have a height between 18 and 24 inches to ensure optimal viewing conditions in standard living room setups. This height range allows the center of your screen to align with your eye level when seated, which minimizes neck strain during long viewing sessions.
When choosing a media unit, consider how its dimensions can affect your comfort, and take the time to measure your setup before making a purchase.
For the average home, a media unit height of 20 inches typically pairs well with standard sofa heights. However, you should adjust the height based on your specific seating arrangement. To find the ideal unit height for your space, measure the distance from your floor to your seated eye level, then subtract half the height of your TV. This calculation will help you select a media unit that supports proper viewing angles while accommodating your equipment storage needs.
Avoid media units that are taller than 24 inches, as they may cause your screen to sit too high, leading to discomfort during viewing. Conversely, units shorter than 18 inches might require you to look down at the screen, which can also create neck strain.
Always prioritize the alignment of your screen’s center with your eye level for the best viewing experience.
Seating Distance Considerations
Seating distance significantly impacts your viewing experience. When you sit eight feet from your TV, you need to adjust the TV’s height differently than if you sit twelve feet away. The ideal viewing angle should be between 0 and 30 degrees when you look at the center of the screen.
Measure the distance from your main seating position to your media unit; this measurement is crucial for determining the appropriate screen height.
If you sit closer to the TV, mount the screen lower to prevent neck strain. For example, if your sofa is eight feet away, the TV should be positioned lower than if your seating is twelve feet away. This distance allows for higher TV placement without discomfort.
Always consider your room’s layout and the arrangement of your furniture before finalizing the height of your media unit. This ensures that you achieve the best viewing comfort tailored to your specific setup.
How Much Depth Do You Actually Need in a Media Unit?
Depth plays a critical role when choosing a media unit, yet it’s frequently neglected. Standard media units typically measure between 15 to 20 inches in depth, which supports most contemporary media equipment effectively.
When selecting a unit, account for an additional 3 to 4 inches of cable management space behind your devices, ensuring proper organization and airflow.
Modern streaming devices and gaming consoles usually measure 10 to 12 inches in depth. However, if you plan to accommodate soundbars, receivers, or vintage equipment, depth becomes essential. Measure the depth of your largest component before making a purchase.
Always measure your largest component first—soundbars, receivers, and vintage equipment often require significantly more depth than standard streaming devices.
Add extra space for ventilation and wire routing. A media unit with insufficient depth can cause cables to bend sharply or result in equipment sticking out awkwardly. On the other hand, a unit with excessive depth can waste valuable floor space in your living room.
To summarize, prioritize depth when selecting a media unit. Ensure that your unit can comfortably house all components while allowing room for cables and airflow.
Planning for Cable Management and Ventilation Space
Proper cable management and ventilation space are essential for keeping your media unit running smoothly over time. Electronics generate heat and need multiple connections, so planning for these needs is crucial.
Essential spacing considerations include:
- Cable organization channels: Create 3-4 inches of space behind each component. This space allows HDMI cables, power cords, and other connections to route properly without bending sharply, which can cause damage.
- Ventilation clearance: Maintain 2-3 inches of space above gaming consoles and receivers. This clearance prevents overheating, ensuring that your equipment lasts longer and operates efficiently.
- Access panels: Incorporate removable backs or cut-outs in your shelving design. This feature simplifies future cable adjustments and equipment upgrades, making maintenance easier.
Following these guidelines prevents tangled wires and equipment damage while keeping your setup clean and professional.
Proper planning now will save you time and frustration in the future.
What to Do When Your Media Unit Is Too Big or Too Small?
If you have a media unit that doesn’t fit your space, you can still create a functional setup. First, assess your existing furniture arrangement. Repositioning your sofa or chairs can create a more cohesive look.
If the media unit is too large, consider downsizing to a smaller unit that better fits your room dimensions. If the media unit is too small, explore options for wall-mounted shelves or additional furniture to fill the space.
Next, evaluate the financial aspect of replacing the media unit. If you have the budget for a new unit, invest in one that matches your room’s scale. Additionally, consider the durability of solid wood furniture, as this can impact the longevity and value of your new media unit.
Alternatively, if replacing the unit isn’t feasible, adjust the entire room layout. Rearranging the layout can accommodate the media unit while maintaining balance in the space.
Each solution requires different levels of effort and cost. Repositioning furniture typically involves minimal expense and effort, while purchasing a new unit or making significant layout changes requires more planning and financial investment.
Weigh these options based on your budget and willingness to make changes.
Quick Fix Solutions Available
Sometimes, a media unit doesn’t fit your living room as desired. Instead of buying a new one, consider these quick fixes that enhance functionality and balance in your space.
Here are practical adjustments to implement:
- Incorporate decorative elements – Position plants, stacks of books, or framed artwork next to a small media unit. This fills empty wall space and creates visual balance in the room.
- Install floating shelves – Place shelves above or adjacent to your media unit. This action extends the unit’s visual presence and increases storage capacity, allowing for better organization of items.
- Rearrange furniture – Shift your seating arrangement or add side tables around an oversized media unit. This makes the unit appear more proportional to the room and improves overall layout.
Implementing these modifications can significantly improve your living room’s functionality and aesthetics without the need for a costly replacement.
Furniture Replacement Considerations
Measuring your living space accurately is the first step to addressing size mismatches between your media unit and available space. When your media unit doesn’t fit correctly, replacing it becomes necessary. Start by taking precise measurements of your room, including wall lengths and ceiling height.
Next, choose furniture styles that align with your room’s aesthetics while fulfilling your storage requirements. For instance, modern media units often feature modular designs that optimize space in difficult layouts.
If your current unit is oversized, consider switching to a wall-mounted unit to free up floor space and create a more open feel. On the other hand, if your media unit is undersized, seek options with larger shelving or corner designs. These units can enhance storage capabilities without cluttering the area.
Investing in well-sized furniture leads to a balanced and functional living room. By carefully considering your measurements and selecting appropriate furniture, you can create a space that’s both practical and visually appealing.
Room Layout Adjustments
When your media unit doesn’t fit your room, adjusting the layout helps you make better use of your space without needing new furniture. Here are some practical steps to optimize the layout effectively:
- Position the media unit diagonally in a corner. This action reduces the visual footprint of the unit and improves viewing angles from various seating positions.
- Adjust the distance of seating furniture from the media unit. Move chairs and sofas closer or farther away to establish a comfortable viewing distance and enhance the room’s proportions.
- Eliminate unnecessary furniture like extra side tables or bulky chairs. Removing these pieces frees up space, allowing your media unit to integrate more naturally into the room.
These adjustments improve the functionality of your space without incurring additional costs.
Common Media Unit Sizing Mistakes to Avoid
Before purchasing a media unit, understand common sizing mistakes that can affect your living room setup. First, ensure your media unit dimensions align with your TV size. A unit that’s too narrow or too wide creates a visual imbalance that detracts from your viewing experience.
Second, consider the viewing distance; aim for a minimum of seven feet between your seating and the TV to ensure comfortable watching.
Next, measure your doorways and hallways before buying a media unit. This step prevents delivery issues and ensures your new unit fits into your space.
Lastly, evaluate your storage needs. Account for gaming consoles, streaming devices, and cable boxes to avoid clutter and maintain an organized space. Additionally, selecting a media unit that reflects contemporary minimalist design can enhance both functionality and aesthetics in your living room.