

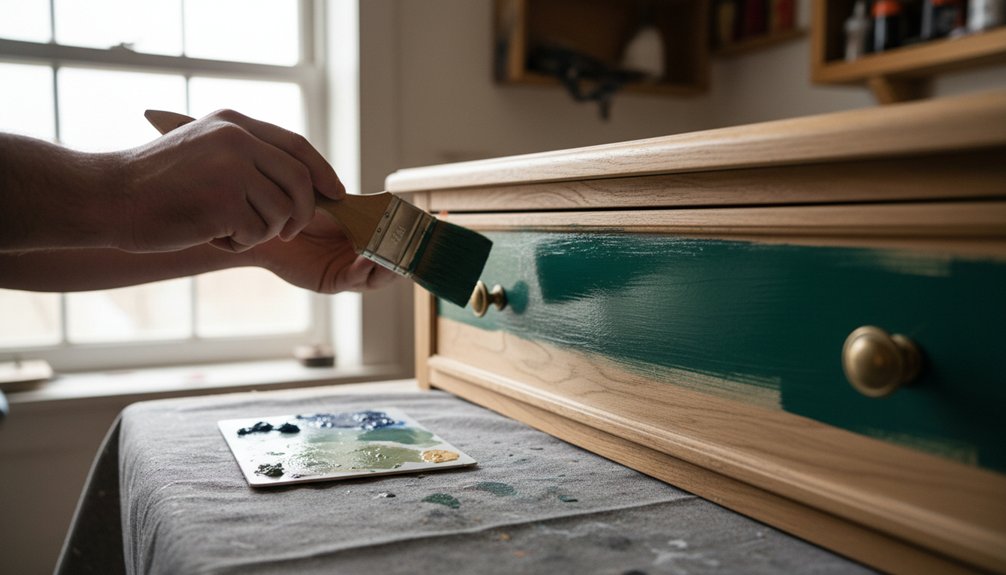
To paint solid wood furniture, start by cleaning the surface to remove dust and grease. Next, sand the wood to create a smooth finish and prime it to enhance paint adhesion. Choose your paint type based on the desired finish: use chalk paint for a matte vintage appearance, milk paint for an eco-friendly rustic look, or acrylic paint for durability in high-traffic areas.
Apply the paint using brushes or rollers while keeping a wet edge to avoid streaks. After the paint dries, seal the surface with wax for light-use furniture or apply polyurethane for strong protection against scratches and moisture. To achieve a distressed look, sand the edges of the furniture lightly after painting. For color selection, consider shades like sage green or charcoal gray, which complement various décor styles.
The following sections will delve deeper into each painting technique, providing practical tips and guidance for achieving the best results.
Preparing Raw Wood Furniture for Painted Finishes
Before applying paint to raw wood furniture, follow these essential preparation steps to ensure a quality finish.
First, clean the wood thoroughly to remove dust, dirt, and any residues from manufacturing. Use a damp cloth to wipe down the surface, making sure it’s completely dry before moving on.
Next, inspect the wood surface for imperfections such as dents or cracks. Fill any defects with a high-quality wood filler. Allow the filler to dry completely, following the manufacturer’s instructions, before proceeding.
Then, sand the wood to create a smooth surface for painting. Start with medium-grit sandpaper (120-150 grit) to address rough areas. After smoothing those out, switch to fine-grit sandpaper (220 grit) to achieve a uniform finish.
Remember to sand in the direction of the wood grain to prevent visible scratches.
After sanding, wipe down all surfaces using a tack cloth to eliminate any sanding dust. This step is critical; leftover dust can interfere with paint adhesion.
Finally, apply a primer specifically designed for wood surfaces. This primer will help the paint adhere properly and improve the overall durability of the finish.
Make sure to choose a primer that matches the type of paint you plan to use for the best results. Additionally, ensuring proper surface preparation is crucial for achieving a long-lasting finish on solid wood furniture.
Chalk Paint vs. Milk Paint vs. Acrylic for Wood Furniture
When selecting paint for solid wood furniture, it’s essential to compare chalk paint, milk paint, and acrylic paint. Each type has distinct characteristics that affect its performance and usability on wood surfaces.
Chalk paint adheres well to wood and provides a matte finish. It requires minimal surface preparation, making it a popular choice for DIY projects. However, chalk paint may not be as durable as other types, so applying a protective topcoat is often necessary to enhance its longevity.
Milk paint offers a more traditional option for wood furniture. It consists of natural ingredients, making it eco-friendly. Milk paint needs a porous surface to adhere properly, so it’s best suited for raw or previously painted wood.
Milk paint can chip easily, which might appeal to those seeking a rustic look but can be a drawback for furniture that experiences heavy use.
Acrylic paint delivers a high level of durability on wood furniture. It creates a hard finish that can withstand scratches and water damage. Acrylic paint requires thorough surface preparation, including sanding and priming, to ensure proper adhesion.
While it offers a wide color range and dries quickly, it can have a glossy finish that may not suit everyone’s aesthetic preference. Additionally, durable finishes can enhance the overall longevity of your painted furniture.
In summary, choose chalk paint for easy application and a matte finish, milk paint for a natural, rustic look, and acrylic paint for durability and a hard finish.
Consider the specific needs of your project and the furniture’s intended use when making your selection.
Paint Properties and Characteristics
Choosing the right paint for solid wood furniture requires understanding how each paint type performs and the finish it creates.
Chalk paint adheres well without the need for a primer, making it a go-to for quick projects.
Milk paint demands thorough surface preparation to ensure proper adhesion and color retention.
Acrylic paint achieves the best adhesion when a primer is applied first.
Each paint type delivers unique visual results:
- Chalk paint creates a velvety, matte finish with slight texture, ideal for vintage-inspired furniture.
- Milk paint offers a flat appearance with natural variations, resulting in an aged look that may chip over time.
- Acrylic paint provides a smooth surface with options for varying sheens, from matte to high-gloss.
Durability also varies among these paints.
Acrylics resist moisture and wear effectively, making them suitable for high-traffic furniture.
Milk paint, once cured, provides exceptional longevity but may require touch-ups due to its potential for chipping.
Application Methods and Durability
Understanding paint properties is crucial for selecting the right product, but proper application ensures project success. Each paint type requires specific methods to achieve the best results.
| Paint Type | Best Application Method | Expected Durability |
|---|---|---|
| Chalk Paint | Brush application | 3-5 years with wax coating |
| Milk Paint | Brush or roller application | 10+ years when properly sealed |
| Acrylic | Spray or roller application | 7-10 years minimum |
Chalk paint requires brush strokes to create its unique texture. Always use a brush for best results with chalk paint. Milk paint needs thorough surface preparation and can be applied with either a brush or roller. For optimal longevity, ensure you seal milk paint after application. Acrylic paint offers versatility; you can achieve a smooth finish using a spray application or cover larger areas efficiently with a roller. Regardless of the type, proper surface preparation and sealing significantly enhance durability.
Applying Your First Coat: Brush and Roller Techniques
After finishing your prep work, you can start applying the first coat of paint to your solid wood furniture.
Decide between using a brush or a roller based on the surface details of your furniture. Use a brush for intricate areas, while a roller is better for large, flat surfaces.
Three Steps for Applying Paint
- Load the Brush or Roller: Dip your brush or roller into the paint, ensuring you have a moderate amount. Avoid dripping excess paint, as this leads to runs and uneven coverage.
- Apply the Paint: Use long, smooth strokes in the direction of the wood grain. This technique results in a professional finish and helps to minimize visible brush or roller marks.
- Maintain a Wet Edge: Overlap each stroke slightly to keep a wet edge. This prevents visible lines where different sections of paint meet.
Work methodically across your furniture piece. Complete one section before moving to the next.
Take your time during this process. Rushing can lead to common issues like brush marks or roller stippling, which detract from the final appearance. Traditional furniture styles often require careful attention to detail, making even coverage essential for achieving a quality finish.
Patience ensures even coverage and a quality finish.
Protective Topcoats for Painted Wood Furniture: Wax vs. Poly
After painting your solid wood furniture, applying a protective topcoat is essential to maintain that finish. The two main protective options are wax and polyurethane. Wax provides a soft, natural sheen and is easy to apply, while polyurethane offers a more durable, water-resistant finish.
When choosing between wax and polyurethane, consider the furniture’s intended use and location. For furniture that will see light use, such as decorative pieces, wax works well because it’s easy to reapply and touch up. To apply wax, simply buff it onto the surface using a clean cloth, allowing it to dry for about 15 minutes before buffing again for a smooth finish.
However, wax does require more frequent reapplication, typically every few months.
On the other hand, for high-use items like dining tables, polyurethane is a better choice. Polyurethane provides a tough, protective layer that resists scratches and water. To apply polyurethane, use a foam brush or a synthetic bristle brush. Apply the first coat, let it dry for at least 4 to 6 hours, then lightly sand the surface before applying additional coats.
For optimal protection, aim for three coats of polyurethane.
Both finishes have their limitations. Wax can wear off quickly in high-traffic areas, while polyurethane can be difficult to remove if you want to change finishes later. Understanding these practical differences helps you select the appropriate topcoat for your project.
Durability and Protection Levels
When selecting a finish for painted furniture, the primary decision lies between wax and polyurethane. Polyurethane offers superior protection against daily wear and tear, while wax requires more upkeep.
Polyurethane provides excellent scratch resistance. It forms a hard, durable shell that protects painted surfaces from spills and humidity. For example, when you place a hot plate on a polyurethane-finished kitchen table, it withstands the heat without damage.
In contrast, wax requires frequent reapplication to maintain its protective qualities.
Polyurethane also safeguards children’s furniture effectively. It resists impacts from toys and cleans up sticky fingerprints easily.
Wax finishes, however, don’t offer the same level of durability and may show wear more quickly.
For outdoor furniture, polyurethane creates a robust moisture barrier. It prevents water from penetrating and protects against temperature fluctuations.
Wax, on the other hand, doesn’t provide adequate protection against rain or extreme weather conditions.
In summary, choose polyurethane for high-traffic areas and furniture that will endure significant use.
Opt for wax if you prefer a more traditional finish and are willing to commit to regular maintenance.
Your choice should reflect how much wear and tear your furniture will face in daily life.
Application Methods and Ease
Wax and polyurethane serve as protective finishes for painted furniture, but they differ significantly in application techniques.
Application Techniques
Wax requires a straightforward application. You use a lint-free cloth or a brush to apply the wax, working it into the painted surface using circular motions. Once the wax is applied, you buff the surface to achieve a shine. This method doesn’t require special tools or ventilation, making it an accessible option for many.
In contrast, applying polyurethane involves more precision. You need a high-quality synthetic brush or foam applicator to apply it in thin, even coats. Each layer of polyurethane requires several hours to dry, and you must sand lightly between coats to ensure proper adhesion. Additionally, polyurethane emits strong fumes, necessitating proper ventilation during the application process.
Comparison of Ease
Wax offers a quicker and more forgiving application process, making it suitable for those with less experience or limited time.
Polyurethane demands patience and careful technique, making it better suited for individuals who are comfortable with detailed projects.
Conclusion
Your choice between wax and polyurethane should reflect your skill level and the time you can dedicate to the project. If you prefer a simpler process, go for wax. If you’re willing to invest time for a more durable finish, choose polyurethane.
Maintenance and Long-Term Care
Maintaining your painted furniture’s protective finish is crucial for its longevity and appearance. Your choice of topcoat—wax or polyurethane—directly impacts your cleaning methods and touch-up processes.
Wax offers a softer, traditional aesthetic but requires reapplication every three to four months. Polyurethane provides a tougher surface that can endure heavy use with less frequent maintenance.
Regular care includes:
1) Wipe painted surfaces weekly with a soft, damp cloth to eliminate dust and prevent buildup, which can dull the finish.
2) Reapply wax every three to four months. Use a clean cloth to buff the wax in circular motions until you achieve a consistent sheen.
3) For chips or scratches, lightly sand the affected area with 220-grit sandpaper. After sanding, apply matching paint, followed by a compatible topcoat to ensure seamless repairs.
Both wax and polyurethane serve to protect painted furniture.
However, polyurethane is the better choice for high-traffic items due to its superior durability. Wax is ideal for decorative pieces that require easier touch-up methods and regular maintenance.
Creating Distressed and Aged Effects on Painted Wood
If you want to add character and vintage charm to your painted furniture, you can use specific distressing techniques that make new paint look like it has endured years of use.
Start by sanding edges and corners with medium-grit sandpaper. This technique removes the top layer of paint in areas that would naturally wear, revealing the underlying wood or base paint. After sanding, apply a darker wax or glaze in the recesses of the furniture to create an antiqued look. Wipe away any excess product to enhance the effect.
Sand edges first to expose underlying layers, then apply dark wax in recesses for an authentic antiqued finish.
You can also create intentional imperfections by striking the surface lightly with chains or hammers. This mimics the genuine wear that furniture accumulates over time.
To add depth, use dry brushing with a contrasting color after distressing. Layering multiple paint colors before the distressing process also helps achieve a more authentic aged appearance.
These distressing techniques offer your furniture historical authenticity and a unique personality. Make sure to test your methods on a small area first to see how the materials interact.
Avoid using overly glossy paints, as they can hinder the aging effect. Each step in the process contributes to a cohesive final product that tells a story of its own.
Brush Strokes and Layering for Textured Painted Finishes
Textured painted finishes turn standard furniture into visually striking items using specific brush stroke techniques and paint layering methods. You achieve depth by applying multiple coats of paint while ensuring that the brush movements remain visible in the final product.
These techniques create character and visual interest that flat paint can’t provide.
To master these layering effects, focus on three key techniques:
- Dry brushing: Use a nearly dry brush to lightly drag across the surface. This technique creates streaky patterns that emphasize wood grain and edges, enhancing the overall appearance.
- Cross-hatching: Apply brush strokes in multiple directions to form a woven texture with intersecting lines. This method builds a more complex surface that adds dimension to the furniture.
- Stippling: Dab paint onto the surface using the tips of the brush. This technique creates a rough and speckled texture, contributing to the depth of the finish.
Each technique allows for controlled application, enabling you to customize your furniture’s final look while achieving professional-quality results.
Remember that practice is key; take time to experiment with these methods to refine your skills and explore how different combinations can enhance your projects.
Best Paint Colors for Different Wood Furniture Styles
Choosing the right paint color significantly impacts solid wood furniture by enhancing or contrasting its inherent style and grain. Current modern color trends highlight neutrals such as charcoal gray, sage green, and muted navy. In contrast, traditional color palettes favor timeless options like classic whites, deep burgundies, and forest greens.
| Furniture Style | Modern Color Trends | Traditional Color Palettes |
|---|---|---|
| Mid-Century | Mustard yellow, teal | Walnut stain, cream |
| Farmhouse | Soft gray, sage | Antique white, barn red |
| Victorian | Blush pink, black | Deep mahogany, gold |
| Contemporary | Charcoal, navy | Pure white, espresso |
When selecting paint colors, consider the existing décor in your room. Dark colors, such as navy or charcoal, can add a dramatic flair to ornate pieces, while lighter colors, like soft gray or cream, can make simple designs appear brighter and more inviting.
For example, a mid-century walnut table can be refreshed with a mustard yellow accent, creating a lively centerpiece. Alternatively, pairing a farmhouse-style table with antique white paint can emphasize its rustic charm. Understanding these relationships between furniture styles and paint colors can guide your choices effectively.
Maintaining and Touching Up Painted Wood Furniture
Once you paint your solid wood furniture, you need a regular maintenance routine to keep it looking fresh and extend its lifespan. Proper care prevents wear and tear while preserving the painted finish.
Regular maintenance routines keep painted wood furniture looking fresh while preventing wear and extending its lifespan through proper care.
Essential Care Practices:
- Dust weekly with microfiber cloths. This practice removes dust and particles that can scratch the painted surface, protecting the smooth finish you’ve achieved.
- Clean monthly with a mild soap and water solution. This step eliminates grime without harming the paint. Regular cleaning keeps colors vibrant and prevents dullness.
- Perform immediate touch-ups with leftover paint and small brushes. Addressing chips and scratches promptly stops them from worsening. Use the same paint to maintain a consistent appearance.
Store leftover paint in a cool, dry place for future touch-ups.
Avoid placing furniture in direct sunlight or extreme temperatures to prevent fading and cracking.
Following these steps ensures that your painted wood furniture remains in excellent condition over time.
Why Hand-Painted Furniture Beats Factory-Finished Pieces
When you select hand-painted furniture, you choose quality, customization, and character. Hand-painted furniture features superior coverage due to artisans layering paint with precision. Artisans apply paint in a way that penetrates the wood grain and fills crevices better than factory methods. You’ll see smoother color transitions and sharper edges on hand-painted pieces.
Hand-painted furniture allows for unique personalization. You can request specific color matches, varying levels of distressing, or decorative techniques that align with your personal style. Unlike factory finishes, which adhere to strict specifications, artisans adjust their techniques based on the individual wood characteristics of each piece.
Repairs and touch-ups on hand-painted furniture are straightforward. You can replicate the original painting technique, ensuring that your furniture retains its aesthetic appeal over time. This adaptability means that hand-painted furniture stays beautiful through years of use.
Understanding these benefits will help you make an informed decision when considering hand-painted furniture versus factory-finished options.