

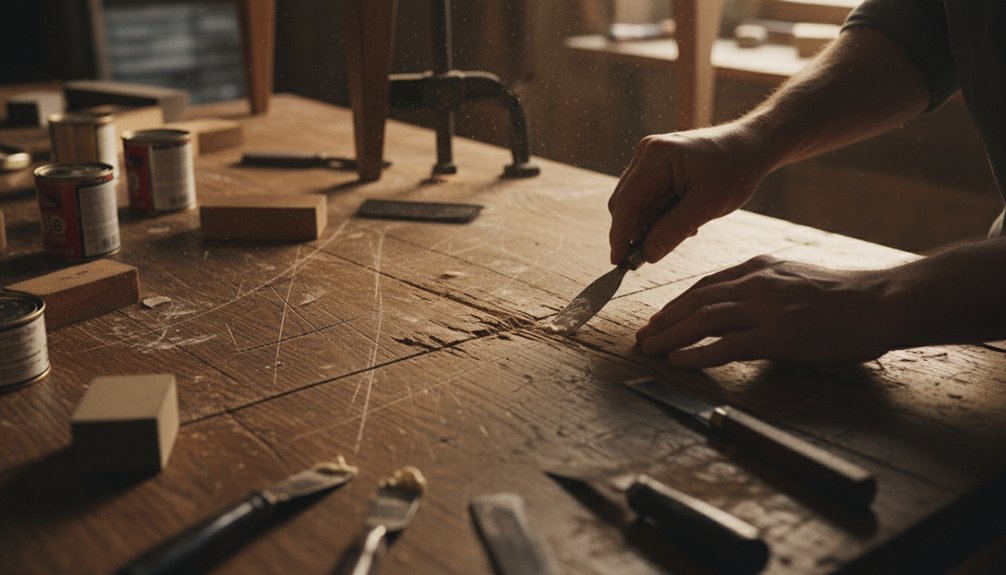
You can repair most wood furniture damage using common household items and basic tools. Fix light scratches by rubbing a walnut over the affected area or using furniture markers designed for wood. For deeper scratches, apply wood filler, let it dry, and sand it smooth before refinishing the surface.
Remove water rings by mixing equal parts vinegar and olive oil, then apply the mixture with a soft cloth. For heat marks, spread mayonnaise over the stain and leave it overnight to absorb the damage.
Repair minor dents by placing a damp cloth over the dent and applying steam with a hot iron for a few seconds. This method raises the wood fibers back to their original position.
Address wobbly legs by regluing the joints. First, disassemble the leg, apply wood glue, and clamp it until the glue dries completely.
This guide outlines these techniques to help restore your furniture effectively.
How to Fix Scratches and Surface Damage on Wood Furniture
Wood furniture often sustains light scratches from daily use and deeper gouges from accidental impacts. You can restore the furniture’s look by using specific repair techniques tailored to the damage.
Daily wear and accidental impacts damage wood furniture, but targeted repair techniques can effectively restore its original appearance.
For light scratches, rub a walnut directly on the scratch. The natural oils from the walnut penetrate the shallow scratches and help conceal them. Alternatively, you can use furniture markers or wax sticks that match the wood’s color to fill in these minor imperfections.
For deeper scratches, first sand the damaged area lightly using fine-grit sandpaper. This process smooths out the edges of the scratch. Next, apply wood filler to the scratched area. Allow the filler to dry completely, then sand it smooth again. After sanding, refinish the area with a matching stain and a layer of polyurethane to protect the surface.
To prevent future scratches and surface damage, maintain your furniture regularly. Clean your wood pieces weekly with a suitable wood cleaner to remove dust and grime. Additionally, investing in quality solid wood furniture reflects a commitment to durability and longevity.
Apply polish once a month to keep the finish looking fresh. Position your furniture away from direct sunlight to avoid fading and maintain consistent humidity levels in your home to prevent wood from expanding or contracting, which can lead to damage.
How to Remove Water Rings and Heat Marks From Wood
When moisture or heat affects the finish of wood furniture, it creates white rings or cloudy marks. These marks don’t harm the wood underneath. To remove these blemishes, you can use several effective techniques.
First, rub the affected area with a soft cloth dampened in a mixture of equal parts white vinegar and olive oil. This combination works to break down the residue causing the mark.
For more stubborn rings, apply a small amount of non-gel toothpaste to a soft cloth. Use circular motions to gently buff the mark away.
For heat marks, you have a few options. One method involves applying mayonnaise or petroleum jelly directly to the mark and letting it sit overnight. This helps draw out the moisture trapped in the finish.
Alternatively, you can use a hair dryer set on low heat. Move the dryer back and forth across the mark continuously to avoid overheating any single spot.
Always test your chosen method on an inconspicuous area first. This precaution helps you avoid causing further damage to your furniture.
If these methods don’t work, you may need to consult a professional for more severe cases.
Repairing Dents and Gouges in Wood Furniture
Dents and gouges can damage the appearance of your wood furniture, but you can fix them without professional help. For minor dents, apply steam using a damp cloth over the area and use a hot iron. The steam will cause the compressed wood fibers to swell back to their original position.
For deeper gouges, you’ll need wood filler. First, clean the area around the gouge. Then, apply the wood filler according to the manufacturer’s instructions, filling the gouge completely.
Allow the filler to dry as specified, usually for several hours. After it dries, sand the area smooth with fine-grit sandpaper. Once you achieve a level surface, refinish the area with matching stain or varnish to blend it with the surrounding wood.
Keep in mind that this method may not work for all types of wood finishes. Some finishes may not respond well to steam, and certain fillers may not match the original wood color perfectly.
Always test a small area before applying any product to ensure compatibility.
Steaming Out Minor Dents
Before you decide to refinish an entire piece of wood furniture or replace any damaged sections, consider using the steaming technique for minor dents. This method works effectively because the impact compresses wood fibers without breaking them. When you apply moisture and heat from steam, these compressed fibers swell and return to their original position.
To remove a dent, first, place a damp cloth directly over the affected area. Next, set a household iron to medium heat and press it down on the cloth for several seconds. Check the area frequently to prevent over-wetting the wood. For deeper dents, you may need to repeat this process multiple times. As you do this, the wood should gradually rise back to its original level, effectively eliminating the depression.
This steaming method is practical and can save you time and effort compared to other refinishing options. However, keep in mind that this method may not work for every type of wood or for very deep dents, so assess the damage before proceeding.
Filling Deep Gouges
Deep gouges in wood require a specific approach because the wood fibers are often torn or missing. To repair these deep gouges, use wood filler to reconstruct the damaged area effectively. Choose a wood filler that matches the color of your furniture or one that allows for staining afterward. Apply the filler with a putty knife, ensuring you slightly overfill the gouge to account for shrinkage during the drying process.
Start by cleaning the gouge thoroughly. Remove any loose splinters and debris to create a clean surface for the filler application. Next, press the filler firmly into the cavity to eliminate air pockets, ensuring a solid fill. Allow the filler to dry completely, following the manufacturer’s specified drying time to achieve the best results.
Once dry, sand the area smooth using fine-grit sandpaper. Work progressively through different grits to achieve a seamless finish. Finally, apply the appropriate finish or stain to blend the repaired area with the surrounding wood.
This method restores both the structural integrity and the aesthetic appearance of the wood, effectively repairing deep gouges.
Sanding and Refinishing
After completing structural repairs, restore the wood’s surface using systematic sanding and refinishing methods.
Start with coarse-grit sandpaper (80-100 grit) to level any filled areas. Follow this with medium-grit sandpaper (150 grit) to smooth out imperfections, then finish with fine-grit sandpaper (220 grit) for a polished surface. Always sand along the wood grain to avoid unsightly scratches.
After sanding, remove dust using a tack cloth to ensure a clean surface for refinishing.
Select a stain that closely matches your furniture’s original color. Test the stain on a hidden section of the wood to confirm the color match.
Apply thin, even coats of stain using a brush or cloth, allowing sufficient drying time between each application—typically around 2-4 hours. Once the stain is fully dry, seal the surface with a protective finish like polyurethane or lacquer.
These sanding techniques and careful product choices ensure that your repaired furniture integrates well with its original finish, maintaining both appearance and integrity.
Fixing Loose Joints and Wobbly Furniture Legs
Loose joints and wobbly legs commonly affect wood furniture. These issues arise from dried-out glue, wood shrinkage due to temperature changes, or the wear and tear of regular use. To effectively address the problem, first identify the cause of the joint failure.
Once you determine the cause, disassemble the joint carefully. Remove any old adhesive and clean the surfaces to ensure a good bond. Apply a generous amount of fresh wood glue to the joint surfaces. Align the pieces accurately and use clamps to hold them together firmly while the glue dries. Allow the glue to cure for the time specified by the manufacturer, usually at least 30 minutes to an hour, before removing the clamps.
If the legs are wobbly, check the connection between the leg and the frame. If the leg is loose, follow the same disassembly and gluing process. In some cases, adding wood screws or brackets may provide additional strength to the joint. Additionally, maintaining at least 30 inches of clearance around your furniture can help prevent accidental bumps that contribute to wear and tear.
Wobbly legs may also indicate uneven floors; use furniture coasters or leveling feet to stabilize the furniture.
Avoid using excessive force when tightening joints, as this may lead to further damage. Regularly inspect your furniture for signs of wear to address loose joints before they worsen.
Identifying Joint Failure Causes
Before you can repair a wobbly chair or table, you must identify the cause of the joint failure. Different joint types exhibit specific signs of failure that inform your repair strategy. For example, mortise-and-tenon joints often loosen due to wood shrinkage, while dowel joints may crack under excessive stress. Careful examination of the damage allows you to select the appropriate repair method.
Common causes of joint failure include:
- Dried-out glue that has lost its adhesive strength over time
- Wood shrinkage resulting from low humidity or aging, which creates gaps in joints
- Excessive weight or stress applied beyond the joint’s design limits
- Poor original construction characterized by inadequate glue application or improper fit
- Moisture damage that leads to wood swelling and weakens adhesive bonds
Identifying these specific issues ensures that you address the root cause of the joint failure, rather than just treating the visible symptoms.
Understanding these factors will lead you to effective repairs that restore the functionality and stability of the furniture.
Regluing and Clamping Techniques
Identify the cause of joint failure. Disassemble the joint carefully to avoid further damage. Clean the joint thoroughly, removing all old glue residue with a chisel or scraper. Ensure the wood surfaces are bare for maximum adhesion.
Choose the right glue for your repair. Use polyvinyl acetate (PVA) for most interior furniture repairs. For antique restorations, select hide glue. Use epoxy for loose-fitting joints, and choose polyurethane for outdoor furniture.
Apply glue evenly to both surfaces of the joint. Reassemble the joint carefully, ensuring proper alignment. Clamp the joint with enough pressure to create a strong bond, but avoid excessive pressure that squeezes out too much glue. Place protective blocks between the clamps and the wood to prevent surface damage.
After clamping, follow the manufacturer’s recommended drying time before removing the clamps. This step is crucial to ensure a solid bond that will last.
Matching and Reapplying Wood Finish After Repairs
After you repair structural damage to wood furniture, the next step is to restore the finish to match the surrounding area. You must observe the existing stain color and sheen level carefully. Test your finish application on a hidden section first to ensure it matches.
Matching existing finishes requires careful observation of color and sheen, with test applications on hidden areas before proceeding.
Clean the repaired area thoroughly, then sand it smooth using fine-grit sandpaper.
Follow these steps for effective results:
- Apply stain in thin, even coats using a foam brush or a lint-free cloth.
- Allow each coat to dry completely before applying the next layer of finish.
- Choose a finishing product, such as polyurethane, shellac, or lacquer, based on the original finish type.
- Feather the edges of the new finish into the old finish to create a seamless blend.
- Buff the final surface lightly with steel wool to achieve a consistent appearance.
Ensure you take your time with each step to achieve a professional look. Avoid rushing the drying time or applying too thick of a coat, as this can lead to an uneven finish. Understanding traditional furniture styles can also guide you in selecting the right methods and materials to maintain the integrity of your piece.
If the stain doesn’t match after a few attempts, consider adjusting the color or sheen before proceeding further.
Tools and Supplies for Wood Furniture Repair
Successful wood furniture repair requires the right tools and supplies tailored for various types of damage. Start with wood glue to reattach loose joints and secure separated pieces effectively. Use repair kits for addressing scratches, dents, and gouges in the wood.
| Basic Tools | Purpose |
|---|---|
| Clamps | Hold glued pieces together while drying |
| Sandpaper (various grits) | Smooth surfaces before and after repairs |
| Putty knife | Apply wood filler to damaged areas |
| Clean cloths | Wipe away excess materials and apply finish |
Organize these supplies in a dedicated workspace for efficiency. Prioritize quality materials over cheap alternatives, as higher quality results in better outcomes. You can find most of these items at local hardware stores or online retailers. Begin with the essential tools, then expand your collection as you take on more complex repair projects.
When using clamps, ensure they apply even pressure to avoid damaging the wood. Select sandpaper with appropriate grits; start with coarse to remove imperfections, then move to finer grits for a smooth finish. Use a putty knife to apply wood filler evenly, ensuring it fills the damaged area without excess. Clean cloths help maintain a tidy workspace and assist in applying finishes evenly.
Avoid using low-quality wood glue, as it may not provide a strong bond. Some repairs may require specialized tools, such as a router for deeper damage or a chisel for precise wood shaping. As you gain experience, you will identify the specific tools needed for your unique repair tasks. Always keep safety in mind by wearing protective gear when sanding or using chemicals.
Protecting Wood Furniture From Future Damage
Repairing damaged furniture improves its look, but preventing future damage is essential for protecting your investment. A solid maintenance routine will keep your wood furniture in top shape for years. Regular care is straightforward and makes a significant impact.
Essential protection strategies include:
- Apply protective coatings: Use paste wax or polyurethane every 6 to 12 months to seal the wood. This step helps prevent moisture and dirt from penetrating the surface.
- Use coasters and placemats: Always place coasters under drinks and use placemats or tablecloths during meals. This action prevents water rings and heat marks from damaging the finish.
- Control environmental factors: Position furniture away from direct sunlight, heating vents, and air conditioners. This practice reduces the risk of fading, warping, and cracking due to temperature fluctuations.
- Dust regularly: Dust wood furniture weekly using microfiber cloths. This action removes accumulated particles that can cause surface scratches.
- Monitor indoor humidity: Maintain humidity levels between 40% and 45%. This range prevents wood from warping and cracking due to excessive dryness or moisture.