

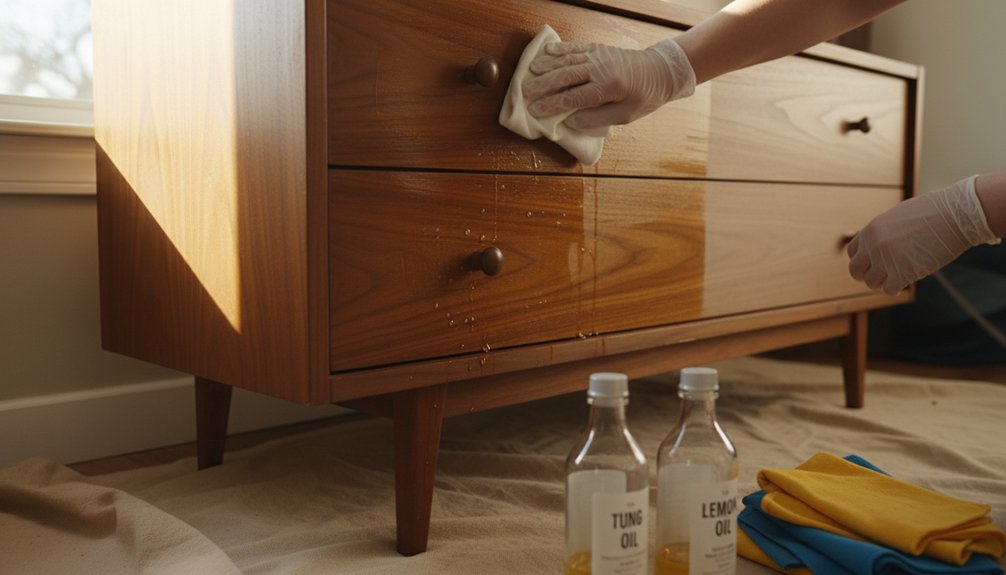
To oil wood furniture, select the appropriate oil based on your needs. Choose tung oil for its water resistance, linseed oil for deep penetration, or Danish oil for a balance of both protection and ease of application.
First, clean the wood surface thoroughly to remove dust and dirt. Next, sand the wood lightly using 220-grit sandpaper to prepare the surface for better absorption. Apply a thin coat of oil using a lint-free cloth, moving in circular motions for even coverage. Allow the oil to soak into the wood for 15-20 minutes, then wipe away any excess oil with a clean cloth.
Wait 24 hours before applying another coat to ensure proper drying. For furniture that experiences frequent use, plan to reapply the oil every 3-6 months. For decorative pieces that see less wear, an annual application is often sufficient. Adjust your schedule based on the climate; humid conditions may require more frequent applications.
The following sections detail which oils work best for specific wood types and outline common mistakes to avoid during the oiling process.
Choosing the Right Oil for Your Wood Furniture Type
Before applying oil to wood furniture, identify the specific type of oil that meets your furniture’s needs. Different oil types provide various benefits based on the wood’s condition and usage.
For example, Tung oil offers superior water resistance and creates a strong finish, making it suitable for high-traffic furniture items. Linseed oil penetrates deeply into the wood grain, which is beneficial for older, neglected furniture that requires rejuvenation. Danish oil blends multiple ingredients to deliver both protection and a pleasing sheen, making it a versatile choice.
Consider existing finishes on your wood. Raw, unfinished wood readily absorbs oil, while sealed surfaces need stripping to allow for proper adhesion. Additionally, the choice of oil finish can significantly impact the overall appearance and maintenance requirements of your furniture.
For food-contact surfaces, like cutting boards, mineral oil is appropriate due to its food-safe properties. Match your oil choice to both the wood species and its intended use to achieve the best results.
Which Oils Work Best for Oak, Walnut, Cherry, and Pine?
When selecting finishing oils for wood, the species of wood plays a crucial role in determining the best oil to use. Different wood species have unique densities and grain patterns, which influence how they absorb oils.
Wood species characteristics—including density and grain pattern—directly determine which finishing oils will absorb properly and provide optimal protection.
For oak wood, penetrating oils such as tung oil or Danish oil work best. Oak’s open grain structure requires these oils to seal and protect effectively.
Walnut wood benefits from walnut oil, but boiled linseed oil also enhances its rich, dark tones.
Cherry wood requires care, as it responds best to lighter oils like mineral oil or tung oil. These oils maintain cherry wood‘s naturally warm color without darkening it prematurely.
For pine wood, use mineral-based oils or diluted boiled linseed oil. Pine’s soft and porous nature can lead to blotchiness with heavier oils, so a lighter touch is essential.
Preparing Wood Surfaces Before Applying Oil
When you prepare to oil your furniture, thorough surface preparation is crucial for achieving a smooth, professional finish. Start by cleaning the wood surface with a slightly damp cloth to remove dust, dirt, and grime. Ensure the wood dries completely before moving on to the next step.
Next, address any imperfections by removing scratches. Use fine-grit sandpaper, specifically 220-grit, to gently buff out minor scratches and scuffs. Always sand in the direction of the wood grain to prevent creating new marks. For deeper scratches, begin with medium-grit sandpaper, then finish with the fine-grit for a smooth surface.
After sanding, eliminate all dust particles using a tack cloth or microfiber cloth. The wood surface should feel smooth and clean to the touch, providing an ideal foundation for the oil application.
Properly preparing the surface ensures the oil adheres well and enhances the wood’s natural beauty.
How to Apply Oil to Wood Furniture: Step-by-Step
Applying oil to wood furniture requires a systematic process to achieve a smooth, protective finish.
Pour a small amount of oil onto a clean, lint-free cloth. Avoid applying oil directly to the wood surface. Use circular motions to work the oil into the wood, following the direction of the grain. This method ensures the oil penetrates properly and prevents streaks.
Apply thin, even coats of oil. Thick layers are a common mistake that can result in sticky residue. Allow the oil to sit on the surface for 15-20 minutes to soak in. After that time, wipe away any excess oil with a fresh cloth.
If you plan to apply multiple coats, wait 24 hours between applications. This waiting period is crucial for achieving optimal protection and sheen.
Drying and Curing Times for Different Wood Oils
Understanding the drying and curing times for various wood oils is essential for planning your woodworking projects. Different oils have specific drying times due to their chemical makeup.
Linseed oil requires 24 hours between coats and takes two to three weeks to fully cure. Tung oil dries more quickly, needing only 12 to 24 hours between applications, with complete curing occurring within a week. Danish oil offers a middle ground; it dries to the touch in six to eight hours.
Linseed oil needs 24 hours between coats, while tung oil dries faster and Danish oil sits in between.
The curing process involves oxidation, where the oils harden by absorbing oxygen from the air. Factors such as temperature and humidity significantly impact these drying times. Warmer and drier conditions expedite the drying process, while colder and more humid environments slow it down.
To achieve optimal results, ensure you allow adequate drying times between coats. This practice prevents issues like smudging or uneven finishes, leading to a more professional final product.
How Often to Reapply Oil Based on Wood and Use?
The frequency of reapplying oil to wood furniture depends on the type of wood, the use of the furniture, and the local climate. Different wood species, such as oak or pine, have unique absorption rates for oil, affecting how often you need to reapply. For example, hardwoods like oak may require less frequent oiling than softer woods like pine.
Furniture that experiences heavy use, such as dining tables or coffee tables, needs more frequent oil treatment. I recommend reapplying oil to heavily used pieces every 3 to 6 months.
Decorative items that aren’t frequently handled may only need oiling once a year or even less often.
Local climate also influences oil reapplication frequency. In dry climates, wood loses moisture and protective oils more quickly. If you live in a dry environment, consider oiling your furniture every 3 months to maintain its protective layer.
In contrast, humid climates may allow for longer intervals between applications, possibly extending to 6-12 months.
Wood Type Affects Frequency
Different wood species absorb and retain oil at different rates, which directly affects how often you’ll need to reapply finish to your furniture.
Open-grained woods like oak, ash, and walnut have larger pores. These larger pores allow for greater oil absorption, necessitating reapplication every 3-4 months. As these woods absorb finish quickly, they also lose it more rapidly through evaporation and regular use.
Close-grained woods such as maple, cherry, and birch have tighter pores. These tighter pores absorb less oil, making them more efficient at retaining the finish. For these woods, you’ll only need to apply oil every 6-8 months.
Exotic woods like teak contain natural oils that resist additional finish absorption. This characteristic extends your maintenance intervals for these woods to once or twice a year.
Understanding these differences helps in creating a practical maintenance schedule tailored to each type of wood.
Usage Level Considerations
Understand Furniture Usage Levels for Maintenance Schedules
Furniture usage levels significantly influence how often you should maintain your pieces. High-traffic furniture requires more frequent care than less-used items.
Recognizing your usage patterns helps you create an effective oiling schedule to protect your furniture and avoid wasting products.
Assess Furniture Exposure to Determine Maintenance Needs
Evaluate your furniture’s exposure to establish an appropriate maintenance routine.
- Daily-use dining tables experience frequent contact, spills, and temperature fluctuations. These factors strip protective oils more quickly, requiring oiling every 1-3 months.
- Display cabinets in low-traffic rooms encounter minimal handling and environmental stress. Oil these surfaces every 6-12 months to maintain their finish.
- Kitchen countertops and cutting boards are exposed to moisture and food residue. Treat these surfaces weekly or bi-weekly to prevent damage.
Identify Signs of Needed Maintenance
Monitor your furniture for signs that it needs oil. A dry surface, loss of luster, or a rough feel indicate that oiling is necessary.
Address these issues promptly to avoid severe damage. Regular maintenance based on actual usage patterns helps prevent costly repairs.
Climate and Environmental Factors
Local climate and indoor conditions influence how often wood furniture requires oil. High humidity levels slow moisture loss from wood, meaning you can oil your furniture every four to five months.
In contrast, dry conditions cause wood to lose moisture and contract, necessitating oiling every two to three months.
Temperature changes also affect wood furniture. Inconsistent heating or cooling stresses wood fibers, leading to quicker drying.
Furniture positioned near heat sources, air vents, or windows experiences more environmental stress and should be oiled every six to eight weeks.
Regularly inspect your wood furniture. If the surface appears dull, feels rough, or shows minor cracks, apply oil immediately, regardless of your planned schedule.
Keeping your furniture well-oiled protects it from environmental factors and extends its lifespan.
Mistakes That Ruin Wood When Oiling Furniture
Oiling wood furniture may seem simple, but several common mistakes can lead to permanent damage. Excess oil creates sticky surfaces, and those surfaces attract dirt while failing to cure properly. Apply thin, even coats of oil instead of saturating the wood.
Here are the key mistakes to avoid:
- Using the wrong oil type – Avoid motor oil and cooking oils. These oils leave furniture sticky and rancid, making refinishing difficult.
- Skipping surface preparation – Always clean the surface before applying oil. Dirt, wax, or old finishes trap contaminants and hinder proper oil absorption.
- Neglecting to wipe excess – After oil application, always wipe away pooled oil. This prevents gummy spots that darken unevenly and create a tacky feel.
Before starting, test the oil in hidden areas to ensure compatibility.
Always follow manufacturer guidelines for application techniques and drying times. By adhering to these practices, you can maintain your wood furniture’s appearance and integrity.
Why Oiling Protects and Enhances Wood’s Natural Beauty
When you apply oil to wood correctly, the oil penetrates deep into the wood fibers. This process creates a protective barrier that shields the wood from moisture and environmental damage. This barrier prevents water from seeping into the wood, which helps avoid issues like warping, cracking, and rot.
Oiling also enhances the wood grain, making natural patterns more vivid and distinct. The oil brings out rich colors and textures in the wood that can often look dull without treatment.
Regular oiling helps preserve the wood’s finish by keeping it supple and preventing it from drying out. Unlike surface-only treatments, oil nourishes the wood from within, maintaining flexibility and reducing the risk of splitting. By oiling, you’re providing the wood with essential moisture, which keeps it structurally sound and visually appealing for years.
If you skip oiling, the wood can dry out, leading to cracks and a faded appearance. An un-oiled surface becomes more susceptible to environmental factors, which can compromise its integrity.
To maintain the beauty and durability of wood, regular oiling every few months is recommended, especially for pieces exposed to varying humidity levels or direct sunlight.
Pairing Wood Oil With Wax and Natural Cleaners
Oiling your wood furniture provides essential protection, but applying wax and using the right cleaning products enhances that protection.
First, apply wood oil to your furniture and allow it to absorb completely. This process usually takes about 15 to 30 minutes, depending on the type of oil used and the wood’s porosity. After the oil has fully absorbed, you can apply a layer of wax on top.
Choosing natural cleaners specifically designed for oiled wood is crucial. Avoid using any cleaners that contain harsh chemicals, as these can damage the finish you’ve created. Instead, look for cleaners made from ingredients like vinegar, olive oil, or beeswax. These natural options clean effectively without compromising the integrity of the oiled surface.
Ensure you regularly maintain your oiled wood furniture by reapplying oil every 6 to 12 months, depending on usage and exposure to elements. This regular upkeep will help preserve the finish and keep your furniture looking its best.
Oil Before Wax Application
If you plan to apply wax over wood oil, ensure the oil cures completely first. Oil curing times vary based on the type of oil and application method, so always refer to the product instructions.
Generally, wood types and temperature affect oil absorption rates. Most oils require 24 to 72 hours to cure before you can safely apply wax.
When you adhere to the proper curing times, you achieve several outcomes:
- Your furniture gains robust protection that guards against moisture damage and wear.
- The natural grain patterns become more pronounced, showcasing the wood’s depth and character.
- You eliminate sticky residue that can ruin the finish and attract dust.
To verify if the oil has cured, touch a discreet area on the surface. If the surface feels tacky or leaves oil on your finger, extend the curing time.
Once the oil has fully cured, apply a thin layer of wax using circular motions for the best results.
Compatible Natural Cleaning Solutions
Several natural cleaning solutions effectively clean oiled and waxed wood furniture without damaging the protective finish.
Mild dish soap combined with warm water creates a gentle cleaner that removes dirt and grime. Use a damp cloth for application to avoid soaking the wood surface.
White vinegar, when diluted with water, cuts through buildup without stripping oil or wax layers.
For eco-friendly options, consider using castile soap solutions or commercial products designed specifically for finished wood.
Always perform a test on an inconspicuous area before applying any cleaning solution to the entire surface. After cleaning, dry the surface immediately with a soft cloth. This practice prevents moisture damage and helps maintain your furniture’s shine.