

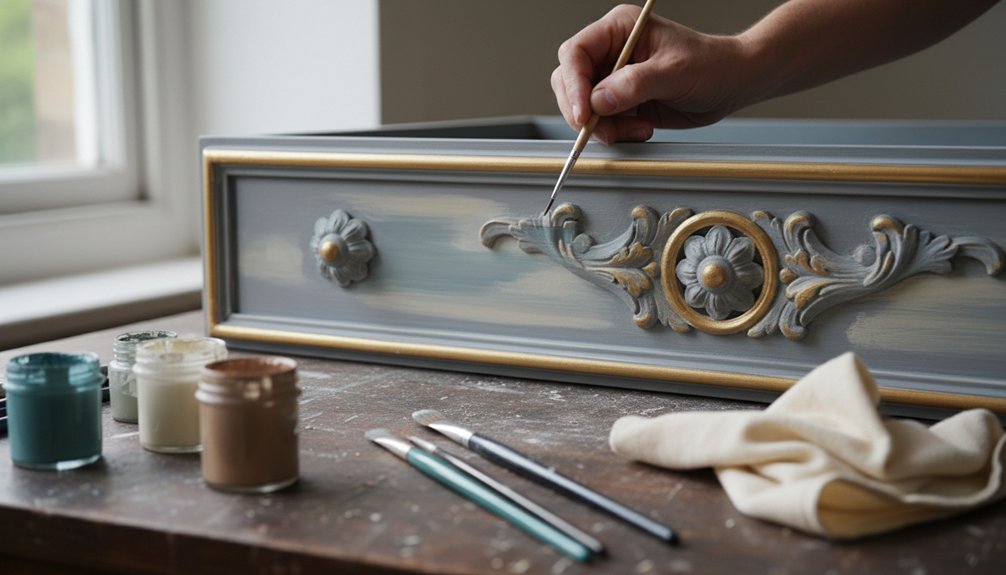
Hand-painted furniture features distinct brush strokes, varied paint thickness, and unique character that factory finishes lack. You can identify quality hand-painted work by examining the smoothness of the surfaces, consistent edges, and well-applied protective coatings.
To achieve these qualities, I focus on specific techniques. First, I load the brush by dipping one-third into the paint to ensure even application. Then, I use long, continuous strokes to create a uniform finish. I apply multiple thin coats rather than a single thick one, which enhances durability and helps prevent drips.
Pricing for hand-painted furniture typically ranges from $300 to $3,000. This variation depends on the intricacy of the design and the experience of the artist. The following sections will delve deeper into the application methods and craftsmanship indicators that define quality in hand-painted furniture.
What Makes Hand Painted Furniture Different From Factory Finishes
Hand painted furniture differs from factory finishes in both the method of application and the resulting appearance.
Factory finishes apply paint using automated spray systems, ensuring that each piece has a consistent look. All items produced in this way will have the same color and sheen, creating a uniform appearance that lacks individuality.
In contrast, hand painting uses brushes, rollers, or other manual techniques. This method allows for unique characteristics in each piece, such as visible brush strokes, inconsistent paint thickness, and varied textures. Each hand-painted item stands out, even if the same colors and techniques are used across different pieces.
The result is furniture that possesses a distinctive charm and character, making every piece one-of-a-kind.
Each hand-painted piece carries its own distinctive charm and character, ensuring no two items are ever exactly alike.
The human touch in hand painting creates variations that machines can’t replicate. This process fosters a sense of personal connection to the furniture, as each item reflects the care and skill of the artisan.
In my experience, hand painted furniture not only enhances the aesthetic appeal of a space but also adds a deeper narrative and warmth that factory finishes simply can’t provide.
Brush Loading, Stroke Direction, and Coverage Techniques
When applying paint to furniture, proper brush loading directly affects how smoothly and evenly the paint spreads. Dip your brush one-third into the paint, then tap it against the container’s side to remove excess paint. This action prevents drips and ensures a controlled application.
Different brush techniques yield varied results on furniture surfaces. Use long, continuous strokes for fewer visible lines, and apply shorter strokes for better control around detailed areas and edges. Maintain consistent pressure throughout each stroke to achieve even coverage.
Stroke variations impact the final appearance of the paint. Working with the wood grain enhances a natural look, while perpendicular strokes help fill in porous areas effectively. Additionally, understanding solid wood furniture characteristics can guide your choice of paint and application method to ensure optimal results.
Always apply multiple thin coats rather than one thick coat for superior results. This method guarantees a smooth finish and reduces the likelihood of runs or uneven texture.
Color Washing, Glazing, and Multi-Layer Paint Techniques
Color washing and glazing effectively enhance ordinary painted furniture, adding depth and character. These techniques involve applying thin, translucent paint layers that allow base colors to show through, which creates dimensional effects unattainable with a single-layer application.
To achieve professional results, you need to understand the proper application methods for color washing and glazing. Start by selecting your base color and ensure it’s fully dry before proceeding. Apply the first translucent layer using a brush or rag, allowing the underlying color to peek through. Keep the layer consistent in thickness to maintain an even appearance.
Next, build layers as desired, allowing each coat to dry before adding the next. Monitor the drying times, as they can vary based on humidity and paint type. Quality checkpoints include inspecting for even coverage and ensuring no underlying color overpowers the top layer.
Remember, limitations exist. For example, using too many layers can muddy the finish and obscure the desired effects. Additionally, avoid using glossy paints for the base, as they may not allow the glazing layer to adhere properly.
In practice, color washing and glazing can transform a simple piece of furniture into a standout item. For instance, using a light blue base with a white glaze can create a soft, airy look. You can achieve a rustic finish by applying a brown base with a darker glaze, resulting in a warm, aged appearance.
Keep these techniques in mind to enhance your furniture’s visual appeal and achieve the professional look you want.
Color Washing Application Methods
Several application methods can effectively transform ordinary painted furniture into unique pieces with depth and visual interest. Achieving optimal results requires understanding wash consistency and color blending techniques. A thin, translucent mixture of one part paint to four parts water or glazing medium works best for color washing. Apply the wash using circular motions with a damp brush or cloth, focusing on small sections for better control and coverage.
| Application Tool | Best Use |
|---|---|
| Natural bristle brush | Creates texture and visible brushstrokes |
| Synthetic sponge | Achieves soft, cloud-like effects |
| Lint-free cloth | Produces subtle, even coverage |
| Spray bottle | Builds up transparent layers gradually |
| Cheesecloth | Generates aged, weathered appearances |
Each application tool provides distinct effects. For instance, using a natural bristle brush creates texture while a synthetic sponge softens the overall appearance. You can layer multiple washes to intensify color or create dimensional finishes that accentuate architectural details. Remember to keep the wash mixture thin and to blend colors carefully, as this will significantly affect the final outcome.
Glazing Layer Build Techniques
Glazing techniques build translucent color layers that enhance the visual depth of furniture surfaces. By layering thin, transparent glazes over dried base coats, you allow underlying colors to show through, which adds richness and complexity to your pieces. Each layer contributes to a dimensional effect that single coats can’t achieve.
To successfully apply glazing techniques, you need to exercise patience and carefully time each coat. Follow these steps to achieve professional results:
- Apply your glaze mixture in thin, even strokes across the entire surface.
- Work quickly to maintain wet edges and prevent lap marks where layers meet.
- Allow each glaze layer to dry completely before adding the next one.
- Build up the color gradually with multiple thin applications instead of thick single layers.
As you layer the glazes, colors will interact, creating visual interest in your furniture.
Keep in mind that rushing through the process can lead to uneven finishes, so take your time to ensure each layer is applied correctly.
Quality Indicators and Finishes
When you evaluate hand-painted furniture, focus on specific visual and tactile qualities to assess the finish. Look for smooth, even surfaces without drips, brush marks, or bubbles. Professional finishes create uniform paint layers that feel consistent when you run your hand across them.
Check for proper adhesion by gently scratching a hidden area; the finish shouldn’t flake off.
Observe the colors for consistency, ensuring there are no streaks or patches. Clean edges should define the boundaries where different colors meet. Any distressing applied should look intentional, not accidental. The final protective coat must be clear and free from cloudiness.
These indicators help you determine if the craftsmanship is skilled or if the application was rushed.
Distressing Hand Painted Furniture: Subtle to Dramatic Aging
Distressing furniture gives freshly painted pieces an aged appearance and adds unique character. You can choose between subtle aging for a gentle look or dramatic aging for a bold vintage effect. The distressing process involves removing paint in specific areas to expose the underlying wood and layers.
Distressing transforms new furniture into vintage treasures by strategically removing paint to reveal wood beneath, creating authentic aged character.
Here are the main distressing techniques:
- Sanding edges and corners: Focus on areas where natural wear occurs, such as the edges and corners of the furniture. This creates authentic touchpoints that reflect real-life usage.
- Using petroleum jelly: Apply petroleum jelly before your top coat to create organic patterns. After painting, wipe away the paint where the jelly was applied to reveal the underlying finish.
- Applying dark wax: Use dark wax in crevices and detailed areas. This simulates the look of accumulated dirt and shadow, enhancing the antique feel.
- Striking with chains or keys: Introduce dents and dings by striking the surface with chains or keys. This mimics the wear and tear that occurs over decades of use.
For professional results, study actual antique furniture. Observe where genuine wear patterns exist and replicate those areas on your piece for authenticity.
Sealing and Protection Methods for Lasting Durability
After you complete your hand-painted furniture piece, you must protect it with a suitable sealer to ensure it lasts for years. The finish you choose, the timing of the application, and the maintenance routine all significantly impact your furniture’s longevity.
Select a protective finish that suits your project. Options include water-based polyurethane, oil-based varnish, or wax. Water-based polyurethane offers a clear finish with low odor and quick drying time, making it ideal for indoor use. Oil-based varnish provides a durable, amber tint but requires longer drying times. Wax creates a soft sheen but needs regular reapplication for optimal protection.
Apply the chosen finish correctly. For water-based polyurethane, use a high-quality synthetic brush to avoid brush marks. Apply thin, even coats, allowing each coat to dry fully before sanding lightly and applying the next coat.
For oil-based varnish, use a natural bristle brush and follow the same technique. If you opt for wax, apply it with a soft cloth, buffing to achieve the desired sheen.
Maintain your furniture to keep it looking fresh. Regular dusting with a microfiber cloth prevents dirt buildup. If you use wax, reapply every six months to a year, depending on wear.
For polyurethane finishes, avoid harsh cleaners and use a damp cloth for cleaning.
Types of Protective Finishes
The protective finish you choose for your hand-painted furniture directly impacts its durability and resistance to daily wear, moisture, and damage over time.
Each type of finish offers specific benefits tailored to various furniture applications and usage scenarios.
Common Protective Finishes and Their Applications:
- Polyurethane: This finish creates a hard, water-resistant barrier. Use polyurethane on high-traffic items like dining tables and chairs to ensure they withstand regular use.
- Wax: Wax provides a soft, natural sheen. Apply wax to decorative furniture pieces that receive minimal handling to enhance their appearance without compromising their integrity.
- Polycrylic: Polycrylic offers a non-yellowing, water-based finish. Choose polycrylic for light-colored painted surfaces to maintain their true color while providing protection.
- Lacquer: Lacquer delivers a professional-grade, hard coating. Use lacquer on surfaces that require exceptional hardness and chemical resistance, such as bathroom vanities or kitchen cabinets.
When selecting eco-friendly finishes, prioritize low-VOC or water-based formulas.
These options minimize harmful emissions while ensuring strong protective qualities for your painted furniture.
Always consider the specific needs of your furniture and its intended use to select the most suitable protective finish.
Application Techniques and Timing
Before applying any protective finish to painted furniture, ensure proper surface preparation and timing to achieve long-lasting results. The timing affects how well the protective coat adheres to the paint. Wait at least 24 hours after painting before sealing. If you used oil-based paint, extend the wait time to 72 hours.
| Application Method | Drying Time | Coats Needed | Best For |
|---|---|---|---|
| Brush application | 2-4 hours | 2-3 | Detailed areas |
| Spray technique | 30-60 minutes | 3-4 | Large surfaces |
| Wipe-on method | 1-2 hours | 4-5 | Smooth finishes |
| Foam roller | 2-3 hours | 2-3 | Flat panels |
Choose your application method based on the finish type and desired sheen level. Each technique varies in drying time and the number of coats required. For detailed areas, use a brush; for large surfaces, opt for a spray technique. The wipe-on method works best for achieving smooth finishes, while foam rollers are suited for flat panels.
Maintenance for Long-Term Protection
Once you apply a protective finish to your hand-painted furniture, regular maintenance is crucial for preserving its beauty and durability.
Cleaning the furniture properly prevents dirt accumulation that can damage the protective coatings over time. Establishing a consistent care routine will extend your piece’s lifespan significantly.
To maintain your hand-painted furniture effectively, follow these steps:
- Dust the furniture weekly using a soft, dry microfiber cloth. This action removes surface particles that can scratch the finish.
- Clean the furniture monthly with a slightly dampened cloth and a mild soap solution. This process helps remove any accumulated grime without harming the finish.
- Inspect the furniture quarterly for chips, scratches, or signs of wear, especially in high-contact areas. This proactive inspection allows you to address minor issues before they escalate.
- Reapply protective coatings annually or whenever you notice a decrease in water resistance. This action ensures that the protective layer remains effective.
Avoid using harsh chemicals, abrasive cleaners, or excessive moisture when cleaning your furniture.
Address any damage promptly by touching up affected areas to prevent further issues. This practical approach keeps your hand-painted furniture looking fresh for many years.
Brush Marks, Edge Consistency, and Signs of Expert Craftsmanship
Several signs indicate whether furniture has been hand-painted by a skilled artisan or done quickly by an amateur. Skilled artisans use brush techniques that ensure smooth, even coverage without visible streaks or ridges. They focus on edge detailing, producing sharp lines where surfaces meet. Consistent pressure throughout each stroke results in uniform paint thickness.
| Quality Indicator | Expert Work |
|---|---|
| Brush Strokes | Smooth, barely visible |
| Edge Detailing | Sharp, clean lines |
| Paint Thickness | Even throughout |
| Corner Coverage | Complete, no bare spots |
| Overall Finish | Flawless, professional appearance |
Examine corners and recessed areas closely. Amateurs often leave drips, uneven buildup, or missed spots. Expert artisans show meticulous attention to these challenging areas, ensuring paint is evenly distributed across all surfaces.
When assessing furniture, look for these quality indicators to determine the level of craftsmanship.
What Hand Painted Furniture Costs and Where to Commission It
Understanding the costs of hand-painted furniture helps you make informed decisions about your custom project. Prices typically range from $300 to $3,000, depending on the piece’s size, design complexity, and the artist’s experience level.
Hand-painted furniture costs $300 to $3,000 based on size, complexity, and artist expertise—know your investment before commissioning custom pieces.
To find a reliable source for commissioning hand-painted furniture, consider the following options:
- Local artisan studios: Visit these studios to meet painters and view their portfolios, which allows you to assess their style and craftsmanship firsthand.
- Online marketplaces: Explore platforms like Etsy, where independent furniture artists showcase their work. Customer reviews can guide you in selecting a reputable artist.
- Interior design firms: Collaborate with interior designers who’ve established relationships with skilled furniture artists, ensuring high-quality work.
- Furniture restoration shops: Contact these shops to inquire about custom painting services. Many offer painting alongside furniture repair, providing a comprehensive solution for your project.
Each of these sources presents unique benefits, including accessibility, customization options, and varying price points to fit your budget and project requirements.